Wednesday, January 25, 2017

Buy Less. Choose well. The gift of a wood watch.

As Justin and I approach our mid 30's we both have been determined to pare down. Pare down both our household items and wardrobes and keep what we love and represents us well. A new theme for the new year: Buy less. Choose well. When January 1st came around, we hunkered down and purged for a couple weeks. We still have a ways to go but I can honestly say that less is truly more. Freedom comes with less stuff. When we think of what to keep specifically from our wardrobes, we ask ourselves what would we pack for a special trip. It's almost always the same items. The pieces we feel most comfortable and confident in.

We've never been huge gift givers here in the Officer household but when we have, they've been really special, well thought out gifts. Recently, I found these wood watches by JORD and knew it was exactly what I wanted to get for Justin. JORD is run by artists and designers who spend the day creating beautiful products. The natural wood and timeless look was right up our alley. We couldn't be happier with the product and company. They were quick, efficient, professional and the quality is unreal. On top of that, the packaging is gorgeous! His Oak & Ash watch under the Frankie series was delivered in the most beautiful wood box to hold his extra links, cleaning oil and cloth. It most definitely falls into our mindset of buy less and choose well. It's just perfect. He wears it everyday to work and I can't wait to add it to our travel bags for our next trip! 

With our excitement for this new beautiful watch, we have teamed up with JORD for a fun GIVEAWAY that is super simple to enter (bonus)! Scroll to the bottom for details!


There's nothing much sweeter than watching a daddy take his daughter out for a special date. 


The beautiful packaging! 


Now to the good stuff. GIVEAWAY TIME!  Click HERE for a chance to win a $100 shop credit to JORD. PLUS, everyone who enters will receive a $25 off shop code! Woohoo! Giveaway ends 2/19/17 and codes expires 4/30/17. Happy almost February to you all! 

XOXO,
Sarah


Luxury Wooden Watch Pin It

Tuesday, January 17, 2017

Our farmhouse-industrial inspired space! Kitchen post #6

It's here! My last post to tie up this kitchen remodel. This has been a lot of fun to document and I look forward to looking back on these posts to see all the changes that were made. The memories made in each phase and the excitement with each step we took towards a kitchen that we love has been such a blessing to take the time to reflect on. It's now 99.9% complete with just a few places to trim, some quarter round to place along the baseboards, a few outlet covers to install and thats it! We've been thoroughly enjoying our new space since September, are pleased with the work we have done and are VERY thankful it's over. Justin and I need a vacation after this one! Here is a progression of pictures standing in the same spot:
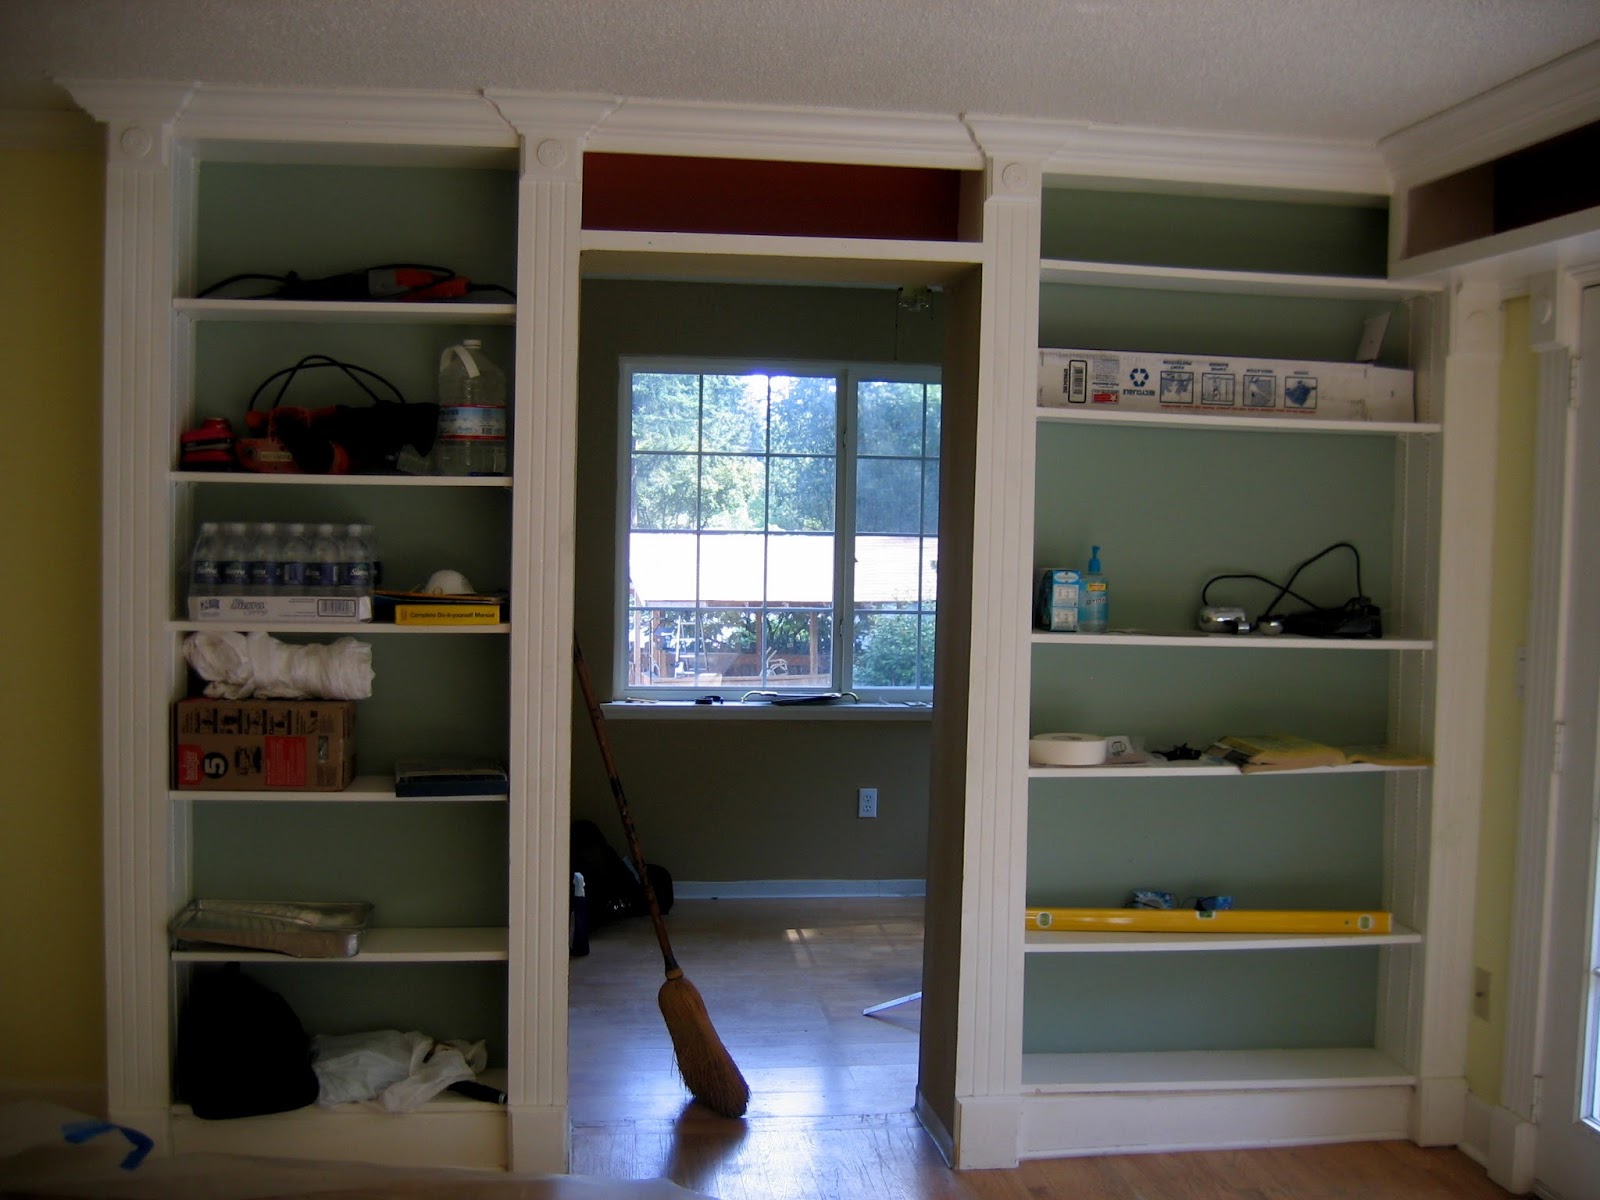
2009
2015
2017

Talk about a makeover! Let me try and give you a breakdown of my design decisions. First off, for this large of a project I made sure to have a design plan in place. At least one that was in my head that I shared with Justin about a million times over. I had a specific plan and he heard me through. He really is so trusting. I like to think that we make a good team with a little bit of crazy.

Knowing your style can be hard. Well, at least for me it is.  I have always been drawn to and decorate a bit eclectic, love vintage, dream of living in a farmhouse but have a deep desire for minimalism, simple and clean plus a new appreciation for mid-century mod. What is one to do with all these pretty styles to choose from?! I had to ask myself questions like: what am I most and first drawn to and what would my dream kitchen look like in this given space? I personally could find these answers by searching my Pinterest boards. There is so much to choose from and be inspired by these days. I'm pretty sure our parents had three maybe four choices. Orange, chartreuse and brown with the options of floral, plaid and shag. After looking through my pin boards over the last couple of years, there was a common theme. I took the looks I loved, combining a few styles and titled it FARMHOUSE INDUSTRIAL. Country boy meets city girl. Just like our love story. Now I need some wine with that cheese! I had to claim this space and give it a style. I wanted texture without overwhelming the space, whites to keep it clean and simple, metals and concrete to give it a hardy farmhouse yet industrial feel and functionality for a family of five.

It's now a space that both my husband and I LOVE to be in. A space our kids can join us in meal prep, do homework, have family meetings, play board games and an overall wide open space to do life in. Plus, hosting friends and family is like a dream come true for this heart of mine that has a deep love and passion for hospitality! We all now fit and can have a food spread large enough to feed the neighborhood. Just how I like it.

The new kitchen:
Once again, the faux beam helps make a visual divide between the living room and kitchen and stated in a previous post, a good option to avoid matching ceiling textures!
I'll eventually get around to painting those extra stools off to the right. Maybe white with a distressed finish?


Christmas cards for days. They stay up through the Winter! Window, door frame and beam will get it's finishing touches in the Spring when the weather is nice and we have the energy to pull all the tools out again!

There you have it! Our DIY kitchen remodel is complete. Thanks for following along and your sweet words of encouragement. If you are ever in the PNW, come say hi!

Much love,
The Officer's


Find a list of kitchen items/information and a few of their links below.

Kitchen items purchased:
Island pendant lights (West Elm inspired) - WinSoon 9 X 9 Inch Globe Vintage Industrial
Sink pendant light - Lowes.
Oven Hood - Ancona Pyramid with Rim stainless steel. Wall mount range hood, 30"
Subway Tiles - Lowe's standard subway tile with a medium grey grout.
Cabinets - White shaker style, soft close custom cabinets from Founders Choice.
Appliances - stainless steal package deal from Sears.
Planked ceiling - 16ft tongue and groove planks cut into 8' planks from Gray Lumber.

Kitchen items that were second hand and upcycled:
Bar stools - originally a yellow wood painted for a fresh updated look
Farmhouse sink
Turkish runner


Pin It

Sunday, January 15, 2017

Cabinets, concrete + stained hardwoods. Kitchen post #5

CABINET DAY! From the time they were built to the time they were delivered was about 4 weeks. I anticipated the delivery like a kid waiting to open gifts on Christmas morning. We actually went on a mini getaway weekend to Anderson Island with some dear friends just hours after these were delivered. We were able to catch our breath over the weekend and came home refreshed to complete this task. Our cabinet decision was pretty simple. We went with a white, shaker style, soft close cabinet. We chose a place in Tacoma called Founders Choice to build them. We did the math and getting basic white cabinets from Lowes or wood cabinets and painting them white was most likely going to cost us a whole lot of time and headache. Plus they wouldn't fit the space to our exact measurements. Choosing custom cabinets ended up being such a relief to us. We sat down with a designer and talked out all sorts of options and they came out to the house to measure and re-measure the space to get it just right. A money saving tip during this step of your remodel is to do self installation. We were confident in Justin's math and leveling skills that we went for it ourselves. It was at least a few hundred dollars if not more to have someone else install so it's definitely worth looking into as a DIY option if you are into pinching those pennies like myself. You can also save on delivery if you have the capability to transport that large of a load. Overall, we were very pleased with our cabinet buying experience and couldn't be happier with the quality.

The order of operations for a kitchen remodel felt tricky. Our floor guy wanted the cabinets installed before the floors were sanded and stained to prevent possible scratching and dings from cabinet installation. They reassured us that the cabinets would be fully sealed off during the sanding and staining process. You also need to have hardwoods sit in your home for a few days so they can acclimate to your home temp before they are installed. It's a whole lot of "this before that and that before this." If you have a kitchen remodel on the horizon, get on the ordering and decision making process before you demo to eliminate the waiting game.   

Next up was plywood tops for our concrete counters.
Measurements for our super fun farmhouse, undermount sink that my brother in-law passed on to us!


Before the concrete pour, you need to install rebar and frame your plywood for the concrete to flow into. Think "infinity pool." The best concrete countertop advice I have for you is to do your homework. Watch YouTube videos extensively and ask for tips from any source you can.

Thank you to our friend Thomas who came over to mix concrete while we worked as quick as we could to smooth the surface. It went way faster than we expected. We almost couldn't keep up with the amount of trowel work we had to do and with how quick the concrete was setting. Our big mistake was buying quick-crete thinking it would take forever for it to set up. Whoops! What's great about concrete is you can fix any blemish by either sanding down or adding more mix. The counters were by far the most stressful part of the re-model but we love how they turned out.

We pulled off the front of the countertop frames and let the counters set for another day before we started the sanding process. We had some corners fall off (and I maybe cried) but Justin was able to reattach it all with concrete glue and filled gaps in with a cement paste he made called slurry. At this point my stress level was so high I loaded up the kids and drove 9 hours to the ranch where my in-laws live to let Justin both buff and figure them out. We played for five days with cousins while back home was a hot mess. If I'm being honest, I was feeling completely broken and hopeless that we could actually get these counters that were looking like rough sidewalks to turn out the way I had intended. While the countertops were being refined so was my attitude. It's easy to be laser focused on something that it becomes your world. It was great having a few escapes along the way to find my sanity once again and gain a little perspective.

Countertops were looking a bit better after a few days of sanding. Rocks were being exposed and they were slowly feeling more smooth. Hooray!
We also added in canned lights to the kitchen. Another day long project but I love the option of lighting we have available to us. Canned lights, a sink light and pendant lights over the island. Take your pick!Canned lights installed and counters are looking glossy!

Justin could do a much better job walking you through the sanding process but all I know is that he used many different grits of sandpaper. I believe he ended with a diamond grit to finish them off. When the sanding was complete, we cured the concrete using 411 impregnator and then used a food grade wax to seal them and give them a marble sheen. After the counters were complete the staining process began. I knew I wanted something dark but natural. We went with espresso which was not as dark as other companies espresso option. We packed up and let the flooring team take over. For this part of the process you have to be out of your house anywhere from three to four days because of the fumes. We went to my parents place and let the kids experience a little bit of normal living.

Laminate and yellow two toned hardwoods forever gone. Whoop whoop!

Tomorrow I'll be back with the finished kitchen and the design decision we made. Thanks for following along. What a fun project to share with our loved ones!

Love,
The Officer's


Pin It

Friday, January 13, 2017

We tried to have fun in the process. Kitchen post #4

When the tools were swept aside, this wide open space was used for dance parties, games nights, soccer balls and lots of chase. Just a few sweet pics during the process to break up the million steps of constructing a new kitchen. I love how my kids seemed totally unphased that our summer was nuts. Not a care in the world even if that meant five million trips to Lowes. Also, Sterling and Capri have the sweetest friendship. There is something special between the oldest and youngest. 

Now I long for summer days where we run around barefoot, have sweet summer tans and find ourselve packing bags on the daily for the beach. Soon enough. 


Pin It

Demo, Drywall, Planking & Flooring. Kitchen Post #3

Summer 2016. Probably the most trying and exhausting yet fruitful summer we've ever experienced as a family. We found out about a week into this project that a kitchen renovation is not for the weary. The kitchen functions as the heart of the home and we had to learn to cope without it. As much as I tried to keep the mess in the kitchen alone, the project lingered into the living room. Tools, drywall, dust and debris everywhere. We knew it would be hard but I wasn't quite ready for the mental toll it would take for me to mother & feed three little ones on a construction site. We slowly learned to function out of our master bedroom. My dresser housed our microwave, toaster and Keurig and we plugged in our fridge on the deck and created a canopy with a tarp. My neighbors could literally see me, pajamas and all, retrieve my creamer for my coffee. It was great. We used paper products and ate a plethora of PB&J's and became well acquainted with the staff at Jimmy John's. As tools took over, decorations and furniture filled the bedrooms to the brim. There is no doubt that more grey hairs sprouted because of this DIY. Once again, totally worth it.

So here is about a month of work stuffed into this one post. Demo, drywall, planking and flooring. On top of those huge projects seen below, sometimes the unseen take the most amount of time. Justin had to re-wire all the electrical and move the gas line (terrifying). He just rocked my face off this summer. The things he knows how to do because of growing up on a ranch. It's impressive. What a crazy project!

Right before the demo commenced.
Saying goodbye to that window wasn't easy. We wanted to extend our kitchen into the breakfast nook so we had to see it go. I think a rule of thumb is to never eliminate natural light if you don't have to but thankfully we have plenty of it with a whole wall of French doors and two other existing kitchen windows.
Curtains down and hammers up. My younger brother Bradley demoed this space like a beast while Justin was away at work. The kids and I were his trusty assistants. Thanks Brad!
Our home is filled with old hardwoods besides the kitchen. This space was a poorly installed section of laminate. We were more than happy to see it go.

Appliances and countertops out the window and all opened up!


A couple weeks later, my brother Jon and his wife Amanda were in town and they installed new insulation and we tackled the drywall together! Thank you two! Capri wanted to wear a tool belt just like her uncle. Heart melted.

Justin and I planked the ceiling and added in a faux beam for an in-home date to celebrate our 11th anniversary. I'd rather be throwing up a hammer with my man than eating a fancy meal! This design was implemented mainly so we didn't need to match the different ceiling textures from the living room to the kitchen. It also broke the space up nicely and added a lot of dimension.
DRYWALL! This was one of the most exciting steps for me. This gave the space its shape for the first time.


Eventually, Justin and I painted the planking white than taped and mudded the drywall. New hardwoods were installed a couple weeks later. Flooring was the one project we contracted out. Some money saving tips on flooring: 1) install your own plywood (ask your flooring contractor the width to use) where the cabinets will sit. We saved a couple hundred dollars not needing to buy hardwood that will never be seen. 2)  if you hardwoods need to be feathered in/blended with old hardwoods, consider putting a header in to save on labor. As you can see next to Justin in the last pic on this post, there is a strip that goes horizontal and no strip where the island would be placed. 3) do the demo/removal of all your old flooring. We obviously removed the laminate in the kitchen but our entry way was filled with white tile. We removed that section and had them install hardwood there as well. It made the whole space that much more cohesive. Tile entry way:

That's it for now. I'll be back with floor stain, cabinetry and countertops next! Thanks for stopping by!


Love,
The Officer's


Pin It

Thursday, January 12, 2017

One wall at a time. Kitchen post #2

This post doesn't scream kitchen but it eventually will. These pictures are taken from our living room looking into our breakfast nook with our galley kitchen directly behind the left built in shelf.

When we first moved in, there was an array of colors. A sliver of yellow, to green, to red, to blue all in one room. Maybe some hot pink and salmon in the bedrooms but nothing a little paint couldn't fix. Sometimes a little TLC is all a home needs. Back in the 60's and 70's, a lot of individual spaces in a home was a common theme. The open floor concept wasn't a thing yet. We were determined to make this place catch up with the times.

We painted everything a neutral sandy color and filled the shelves and called it home:
Then one day I said "hey hun, you want to bust down that wall for a date night?" The hubs replied with a "definitely!" ...and this folks is how it all happens every.single.time. A whole lot of crazy. So we cleaned out the bookshelf and got to work. No turning back.
We thoroughly enjoyed our new opened up space. Phase one felt complete.


Fast forward a year (give or take...can't remember) and we were finally ready / had a wild hair to demo the other bookshelf in the living room that would fully expose the kitchen to our main living area. This was a little more technical and time intensive because of wires, more wall to remove and some finishing work. This felt like a really big deal to Justin and I. For the first time we were able to be in the kitchen and see another part of our home. To see the kids playing and running around the house and watch them on the deck was so exciting and it virtually cost us nothing. Hosting felt that much more special. I could see and talk with our guests while cooking. The only downfall was losing half of my  cupboard space but we both decided it was worth it. My crockpots found a new home in the dining room.

Here is a series of pictures of opening up our galley kitchen to create a peninsula. Goodbye cupboards!
Oh hey living room! I see you!
I'm pretty sure this was Valentine's day. If I remember correctly, we demoed this wall and then played a game of racquet ball which I became overly competitive in. We're super romantic like that.

Always a helper on the construction site:
Happy kids, happy wife, happy life.
Our kitchen stayed in this state for about 2.5 years. Tomorrow I will be back with the full demo of our kitchen and all our construction steps and design decisions! Thanks for being a apart of our journey!

Love,
The Officer's Pin It